About Mary

Mary Ellen Ward is a farm-raised content writer, mother, homesteader, wife, ghostwriter, and published author. Through her blog writing and publishing, she aims to find ways to make good, traditional eating, backyard farming, gardening, and fun stuff like easy home wine making and tea making to others like her--busy with the needs of modern life, committed to the best of years gone by.

10 Ways to Gift One Simple, Inexpensive Mix

Mason jar mixes are ideal for holiday gift-giving, especially when you have a long list of people to whom you care to show your appreciation. Gift jar mixes have the advantage of being affordable, appreciated, useful and attractive, all at the same time. They can fit the bill for a long line of gift recipients from coworkers to coaches, teachers, instructors, service providers, extended family members, and many more.

To be sure, having a variety of jar mix recipes to choose from is nice, but considering how busy and expensive the holidays can very easily get, it’s nice to have something a bit more versatile that can be worked up and packaged in short time, yet still deliver a number of excellent gift-giving options.

It’s All In How You Look At It

10 Ways to Gift Mason Jar Baking MixTake, for example, the homemade all-purpose baking mix in Make-Ahead Mix Day. This recipe requires a minimal amount of ingredients (a couple cups of shortening, a standard five-pound bag of flour, a bit of salt, sugar, and baking powder), but it yields better than five quarts; and it only takes about five minutes to do it. Cheap and easy. Exactly what the budgeting gift-giver needs. The thing is, this mix can be used in numerous ways. So while you might not really want to give someone a dressed-up jar of “all purpose baking mix”, you’ll feel good about giving a nice homemade “Country Quick Mix” or “Sunday Morning Waffle Mix” with a nice label and instructions attached.

If you take my meaning here, it’s all in the presentation and the suggestion. You’re still giving a great-tasting mix that you’ve put your own time, money, and effort into, but you’re giving it with style in a way you can afford.

You can search this site or the ‘net for different ideas and potential presentations, or go with one of your own favorite tried-and-true classics. Any recipe that uses Bisquick(R) or another biscuit or baking mix will work just fine with this recipe, so simply print the recipe to include with your festively-decorated jar mix (a nice parchment or holiday paper is a nice touch). To get the creative juices rolling, here is a list of ten great ways (in no particular order) to repackage this one simple mix and have a variety of gifting options:

  1. Morning Pancake Mix (what busy Mom or Dad wouldn’t appreciate that?)..top it off with a half cup of chocolate chips or dehydrated fruit and now you have flavored pancakes, to boot.
  2. The aforementioned “Sunday Morning Waffle Mix” (to which the same doctoring methods above apply)
  3. Home Style Country Biscuit Mix
  4. Quick & Tasty Cinnamon Roll Kit (gifted in a basket with a small jar of powdered sugar and nicely-tied baggie or small jar of cinnamon sugar)
  5. Muffin Mix
  6. Quick Bread Mix (with or without additions)
  7. Scone Mix
  8. Cornbread Mix (just add in the 6 TBSP of corn meal – especially nice with a bean mix for soup or chile)
  9. Cupcake Mix
  10. Tea-Time Coffee Cake Mix (throw in a sealed baggie with topping ingredients on top of the mix in the jar)

So you see with a little imagination giving a quality homemade gift does not have to be overly costly or time-consuming. You can feel good about giving gifts to everyone on your list without stressing yourself or breaking the budget.

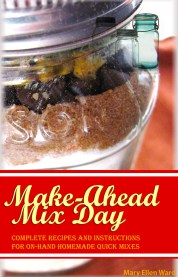
You can find both an easy all-purpose baking mix suitable for these and many other recipes and a variety of other equally good jar mix recipes for Christmas gifts (or just healthier, more affordable pantry-stocking!) in Make-Ahead Mix Day: Complete Recipes and Instructions for On-Hand Homemade Quick Mixes. It’s available for Kindle and compatible eReader apps as well as in a downloadable PDF.

Be sure to Subscribe to The Homemade Homestead keep up with all the recipes and posts from The Homemade Homestead. You’ll get only updates from this site, and your information will not be sold!

A Glimpse Inside the Make-Ahead Mix Day Companion PDF

Wondering what’s inside the Make-Ahead Mix Day Companion PDF that isn’t in the full-text PDF or Kindle version?

Labels, Labels, and More Labels!

Of course all the recipes are there ready to be printed, too, but the biggest advantage of the printable Companion PDF, and the sole reason it was designed and made available, is to deliver to you an easy-to-use set of labels for every homemade mix recipe in the book. When it comes time to actually use your mix and bake your goodies, you don’t want to have to go searching for the instructions.

Convenience is the first motivation behind the book, and convenience is what you have with your shelves stocked with wholesome, homemade baking mixes complete with labels and instructions. Here’s a glimpse of what you’ll get!

Label Sample Image

These labels couldn’t be easier to use – just print them on your printer, trim the circle with any old pair of scissors (old school!?) and they will fit between the lid and the ring on two-piece canning jar lids. No need to glue them, and they if you save them when you use your mix you can use the same labels again and again.

Ready to buy the PDF? You’ll find all the Make-Ahead Mix Day purchasing options here:

Buy Make Ahead Mix Day and PDF’s


Make-Ahead Mix Day Full Text and Companion PDFs On Site at a Bargain

We have a PDF!

Make-Ahead Mix DayThe Companion PDF is ready and waiting for you! And because there was such a large amount of interest in a non-Kindle eBook version, I’ve also made a PDF version of the full book available. Everything is accessible via the Make-Ahead Mix Day page here on this site. All the details are on the page and everything is 99 cents during launch (prices will be climbing at some unknown point, so now’s your bargain!).

Please know that any and all feedback is appreciated, and I’d love to hear your thoughts on any version of the book, either in the comments below or via the contact page.

Thanks again and Enjoy!

Make-Ahead Mix Day Now Live on Amazon

Yes the blog’s been quiet – apologies! But with good reason…I’ve been working on getting all my homemade baking mixes, those that I keep stocked up on-hand for week-night baking and morning meals (and more), into a book! It is available now on Kindle, and in the future will be available on other platforms as well, but for now we’re here and that’s a start!

Make-Ahead Mix Day

This book is designed for ease-of-use and affordability. In it are 21 recipes for things like homemade cookie mixes (sugar, gingerbread, chocolate chip, peanut butter…), homemade brownie mix, instant oatmeal mix, muffin mixes, and homemade all purpose baking mix. Basically these are all the recipes I work up in an afternoon to stock up my pantry with preservative-free baking mixes for a month or more. Mason jars are my storage container of choice (they are the best!) and so the recipes are listed specifically for one- and two-quart mixes that come together quickly, store well, and taste great.

And A Bonus For You, Too!

Now here’s the deal – there is a printable companion PDF that is in the works and will be available for sale via my this site in the upcoming days. It is intended as an accompaniment to this book and a way to give you printable copies of the recipes and sets of labels to use when you prepare your jars that include the preparation (baking) instructions (very simple, no muss, no fuss).


BUT like I said, the PDF isn’t ready quite yet. So for your patience, if you download the full book before it is ready and follow the links at the end, you will be given a link that allows you to sign up for a FREE bonus copy of the PDF when it becomes available. Anyone on my subscription list before the PDF goes live will be emailed a copy of the PDF for free before I activate the sale module. After that time, it will be available for full price. So better to get while the getting’s good 😉


Homemade Bisquick Recipes: Classic Biscuits

Be sure to Subscribe to keep up with all the recipes and posts from The Homemade Homestead. You’ll get only updates from this site, and your information will not be sold!

Classic Biscuit RecipeEarlier this week I gave you a Classic Pancake Recipe to use with your homemade baking mix. Today, to continue our list of reliable stand-by recipes, I give you another necessary, a homemade Bisquick (R) biscuit recipe. You’ll come back to this recipe again and again as a side for soups and stews, a base for biscuits and gravy, a topping for pot pies, a base for shortcakes, or just to enjoy with some butter, jam, honey, maple syrup….


…Obviously the possibilities and uses for classic biscuits are endless, but it all starts with a good, solid recipe!

5.0 from 1 reviews
Homemade Bisquick Recipes: Classic Biscuits
Author: 
Recipe type: Side
Cuisine: American
Prep time: 
Cook time: 
Total time: 
Serves: 12 Large
 
A good old-fashioned, classic biscuit for use with homemade All Purpose Baking Mix (homemade Bisquick).
Ingredients
  • 5 Cups Homemade All Purpose Baking Mix
  • 1½ Cups Milk (or buttermilk)
Instructions
  1. Simply mix the 2 ingredients together to form a soft dough without over-stirring (just until mixed through).
  2. Turn onto floured surface and knead about 8 times.
  3. Pat or roll to ¾ inch thickness.
  4. Cut and place on ungreased cookies sheet.
  5. Bake at 400 for 12 minutes or until golden brown.


What other Bisquick recipes or recipes for use with your all-purpose baking mix would you like to see? Contact me or leave a comment below and I’ll see what else is lying in my box!

Homemade Bisquick Recipes: Classic Pancakes

This year we’ve added maple sugaring to our homesteading list, and so the past weeks First Batch Homemade Maple Syruphave been peaks and valleys of activity boiling down sap. The result is a nicely flavored rustic maple syrup. So far we’ve managed more than 4 gallons of homemade pure maple syrup; which of course has us thinking pancakes pretty steadily around here!

That brings me to today’s post–a basic homemade Bisquick(R) recipe for pancakes to begin building our recipe book to go along with our all purpose baking mix. After all, what good is a mix without something to make from it?

Homemade Bisquick Pancake Recipe

Bisquick Pancake RecipeThis pancake recipe is a simple yet very tasty staple that works up quickly but deliciously, and will help you send your family off ready for the day.

With the ease and affordability of your ready-made all purpose baking mix and this quick recipe, you’ll find it easy to send your crew off well-fed each and every day.

Homemade Bisquick Recipes: Classic Pancakes
Author: 
Recipe type: Breakfast
Cuisine: American
Prep time: 
Cook time: 
Total time: 
Serves: 4
 
A quick and easy, tasty and fluffy pancake recipe to use with your homemade Bisquick or all purpose baking mix.
Ingredients
  • 2 Cups Homemade Baking Mix
  • 1 Cup Milk (or Buttermilk if preferred)
  • 2 Eggs
  • *Can add any favored additions such as berries, nuts, or chocolate chips.
Instructions
  1. Mix all ingredients together and whisk or stir until moistened and mixed through, but not over-worked.
  2. Pour onto hot griddle or pan over medium-high heat.
  3. Cook first side until small bubbles appear and pop, then flip.
  4. Cook second side until golden brown.
  5. Serve warm with maple syrup or favorite toppings.

One more old-reliable recipe to fill out your box!

There are more to come, so if you found this post helpful please subscribe to the Homemade Homestead via email and never miss an update!

Making Homesteading Work: Budgeting and Maximizing Food Usage

Making homesteading work in these modern times can be a challenge. Even keeping up with just the minimum of home and property bills requires a sizable income, at least until you own your property outright. For many households (perhaps most) that translates into dual income necessity, or at least a supplemental secondary part-time income. This can make homesteading and being self-sufficient a challenge; a challenge that many give up Happy Homesteadon, and understandably so. Life today is harried, busy, stressful, and expensive.

So does that mean that reaching your homesteading and self sufficiency goals is beyond you? Certainly not. But it does require some thought and planning. It requires give-and-take (but all good things do, don’t they?) and it requires finding ways to cut money from a typical modern household budget to accommodate for either the cost of homesteading and animal care or the cost of “lost” income.

Doing the Income Dance

To give you an example, in our household my husband runs his own logging business and I help out on the book-keeping end of that. I also work from home part time as a freelance writer. Largely, though, we rely upon my husband’s income so as to free up my time for home and homesteading. My work and income is kind of peaks and valleys, intentionally so, and therefore is not as reliable. I’ve limited client commitments and am working more towards independent publishing and blogging, which gives me the ability to work more during “off peak” garden and homesteading seasons and reduce or even eliminate my workload during those times of year when the gardens, food preparation, and preserving requires more of my time and attention.

In essence what we are doing to make homesteading work here is in part “sacrificing” some of the more modern lifestyle and stuff (but not all by any means) and working to strike a balance in the budget that works. The more we produce here the lower our food bills outside of the homestead, but we are not able to completely wipe them out. In addition, proper animal care does require us to maintain a feed budget. We moderate that the best we can (more on that another day) but it still remains a line item in the bottom line.

Considering the Costs

One of the things we do do to find and maintain this lifestyle-budget balance is to consider the costs of a typical grocery budget and then match that against what I am able to produce or provide by trading “working” (as in, paid work) time for home provision and production time. It turns out that I can actually break even or perhaps even do better by not working outside the home. Using USFDA figures, a modest estimate of what a family of four can expect to pay for a moderate food expense is over $1,000 per month for a couple and two children in the 6 to 11 age range. Now consider that I have 2 children older than this (our range is more like 8-14) and that we are a family of six, not four. Using the formula provided by the FDA and calculating out the cost to feed a family of our size, gender, and age make-up, the average moderate food expense for us is estimated at a whopping $1511.36 per month!

So for us it’s easy to place a monetary value on my not working just by looking at what our grocery cost would be if I were not able to be here and not able to produce the volume of food that I/we do. Even considering feed costs and animal upkeep, we’re not spending anywhere near $1500 per month. And then to that we could start adding in all the other factors…for example, the quality of the food, the health and well-being benefits of not pickling ourselves in preservatives all the time, the body benefits of the activity of animal care, not having the expense of vehicle upkeep, gas, etc. that comes from commuting, not incurring daycare costs for after-hours or vacation and sick days, and on and on. So…

Where am I going With This?

Yes, that's a lot of tomatoes. But you can make them pay in more ways than you'd think!

Yes, that’s a lot of tomatoes. But you can make them pay in more ways than you’d think!

Well honestly when I started out this morning I intended to map out all the ways that I utilize the milk supply from our backyard Jersey cow to justify her expense and see how we make her pay us back. Clearly I’ve veered from that a little, so we’ll get into that topic in an upcoming post.

I guess for today, then, we’ll just take this post as a primer for that conversation and others, the basic theme of which is finding the ways to make a homesteading and self-sufficient lifestyle pay and the ways to incorporate that with living in today’s modern society, all things considered. If there is one thing to take away for today, it’s that there really is a real, not imagined, monetary trade-off to homesteading and if properly planned and managed you can actually make the rewarding lifestyle you have chosen, or are thinking about choosing, pay.

For me personally, given my role here in our household, that falls to utilizing the food we produce as best I can to cover as many budget-bases with it as best I can. So, as mentioned, as we progress I’ll start listing and laying out the varied ways I’ve found to maximize that food use. By no means will my lists be the be-all and end-all, but they will be (good, I hope) examples of what you can get out of a basic homestead and how doing that makes the whole thing feasible.


KitchenAid Recipes: KitchenAid French Bread

Looking for great KITCHENAID BREAD RECIPES? Download this book in seconds for all the best basics!
Your Daily Homemade Bread
Easy Stand Mixer Bread Recipes: Best Basics

Under $3.00 – Less than a loaf of bread – 13 recipes and bonus ways to use them!

Although my Best KitchenAid Bread Recipe is my everyday standby, sometimes I want something slightly different, such as when I want a nice white loaf to accompany a pasta Stand Mixer French Bread Recipe dish or a soup or stew (although, the “Best” recipe is also an excellent choice for breads and stews, and when formed into rolls it makes excellent dinner rolls, too).

For those times, I turn to this delicious, reliable, and easy KitchenAid or stand mixer French Bread recipe. Like my standby, it uses instant or rapid rise yeast (bread machine yeast is the same thing and works, too), requires no hand kneading, and requires only one rising period, so it sets up fast. Start it before you start your main course and by the time you get through prepping your main dish you’ll be ready to bake and serve this loaf along with it.

You’ll find the recipe here along with 12 other recipes (from that excellent Everyday White Bread to whole grain breads, wheat, crescent rolls, bread bowl instructions….). Every one of them use the same VERY simple stand mixer bread method; this is not just the same old traditional recipe put through the KitchenAid, this is actually a different recipe with different (shorter!!) instructions designed especially for the stand mixer. For under three bucks you’ll have a solid, reliable, simple collection of breads that you can use every day – as easy as using a bread machine but better because it is real oven-baked bread that doesn’t have that “machine” flavor.

Get this recipe and others here: Easiest KitchenAid French Bread Recipe

Homemade French BreadThis recipe makes two sizable loaves, but if you don’t think you can use that much bread you can freeze the dough once shaped (before baking) for use another day. You could also bake the bread and freeze the baked loaf. Or you could shape the second half of the dough into personal-sized loaves for sandwiches or grinders. Or you could cut the second loaf into cubes to make homemade croutons.


As always, do Enjoy and if you liked this post, Subscribe so you don’t miss a beat!


Bisquick Recipes: Beer Batter Chicken Nuggets

One of my family’s favorite Bisquick recipes that I make with my homemade all-purpose baking mix is this one for Beer Batter Chicken Nuggets. I made it as a weekend treat one Saturday and it’s become a fast favorite. I was actually surprised by that because my husband is no fan of fried foods, but this one he loves. So it’s got to be good, right?

Beer Batter Chicken Nuggets Bisquick RecipeAThis recipe can be pretty quick to prepare (although the deep frying takes some time, I won’t lie). The batter itself is extremely easy to make with the homemade bisquick mix recipe here on this site (see link above). If you buy boneless chicken breasts and cut them to size it’ll be fairly short work. Here on the homestead, though, we try to use as much of our own home-grown meat as possible. We process and freeze between 60 and 80 meat birds every year so when I make these I bone out and chunk up the meat from some of my own. When I do this I use the whole bird – light and dark meat all goes into the mix and comes out delicious.

You, of course, should use whatever you prefer. Even if you do not have your own home-grown chicken on hand, buying a roaster and boning/cutting off the meat will still save you a lot of money and will give you a big batch for much less. Don’t worry about making too much, either. I’ve never had leftovers go past the next day, they reheat easily and deliciously in the oven, and once cooked they would be great to freeze and reheat later, too…a great make-ahead convenience treat!

So now, on to the recipe!

Homemade Beer Batter Chicken Nuggets

Bisquick Recipes: Beer Batter Chicken Nuggets
Author: 
Recipe type: Bisquick Recipe, Poultry
Cuisine: Comfort and Convenience Foods
Prep time: 
Cook time: 
Total time: 
Serves: 4
 
A sure family favorite that will leave you shunning freezer-aisle chicken nuggets.
Ingredients
  • 2 to 3 pounds Chicken, cut into approx 1½ inch cubes (or approximate shapes)
  • 1 Cup Homemade All Purpose Baking Mix or Bisquick
  • 1 Egg
  • ½ Cup Beer
  • ¼ to ½ tsp Garlic Powder (to taste)
  • Salt and Pepper to Taste
Instructions
  1. Beat egg slightly, then add beer.
  2. Add egg and beer mixture to measured baking mix.
  3. Stir to combine, until most of the lumps are gone.
  4. Cut chicken to desired size and add to wet batter mixture as you go.
  5. Let chicken chunks stay in the batter until you are ready to fry.
  6. Heat shortening, lard, or cooking oil in a deep frying pan or dutch oven.
  7. When oil is ready, add chicken chunks and fry until golden brown, turning when the first side is browned (about 3 minutes in 365 degree fat).


Bisquick Beer Batter Chicken NuggetsI generally do a lot of nuggets when I do make these, and I usually triple or even quadruple the batch. If you are planning to bone a roaster, plan for one recipe of batter for each whole bird you bone out (so if I bone 3 of my birds, I triple the batter batch). If the chickens you bone are large, you may need a triple batch of batter for every 2 birds. (No worries, though, it’s simple to mix up a bit more batter if you think you need more–takes just a minute!).

These chicken nuggets are also an excellent base for sauces either for dipping (we like honey mustard barbecue sauce) or to coat with for things like Buffalo Chicken Nuggets or Chinese foods like Sweet and Sour Chicken or General’s Chicken (just add sauce & accompaniments & toss).

As always, I hope you do enjoy!


Like this post? Then be sure to SUBSCRIBE so you don’t miss out on more tips and recipes!


Chick Incubation Success!

Our first born chick!

“Emily” the chick

This is the first year I have ever tried to incubate my own chicks. I’ve had a broody hen here and there, a random chick or two to hatch and a near-hatch with a Muscovy duck (which unfortunately fell prey to something that also got into its eggs-very sad), but we’ve never truly successfully hatched anything out that would give me that feeling of being self-sustaining from our own breeding stock and growing the farm and feed resource.

What prompted me to really give egg incubation a try and to commit to it as a real self-sustaining line of livestock poultry is our Pekin ducks. We raised 11 to adulthood last year, 8 of which went into the freezer and a pair of females and a drake that we held over as future breed stock. These are birds that I purchased as day-old ducklings from Metzer Farms in California which were shipped here to me in Massachusetts. I have to say Metzer’s was excellent stock and everything from ordering to arrival and beyond went smoothly. I highly recommend them as a duck, goose, or game bird resource, most especially if you want a small to moderate number of birds (for smaller orders, they are one of the most affordable). In addition, the Metzer site is a top-notch resource for raising fowl and I have referred back to them when I’ve had questions or curiosities time and again throughout the year.

To get back to the tale, though, I got serious about incubating and hatching because it turns out that Pekin ducks are good breeders and layers, but are not good “setters”. That simply www.thehomemadehomestead.commeans they are a good resource for me and our little homestead for fertile eggs, but the birds have lost their natural instinct to set on the nest and incubate the eggs themselves. One of the girls has something of a mothering instinct, but she just can’t quite seem to commit 100%. It soon became clear that if I wanted my birds to lay the foundation for this year’s meat duck flock I would have to take more of a hand in the process.

As an aside, I did also have one other option and that was to utilize a bird that did have broody tendencies and slip the eggs into her nest. This could actually be either a chicken or a broody duck. My hen house is not well set up for this, my broodiest hen had passed from old age  and although I do have a female Muscovy left that goes quite broody when the time is right, the time is only right for her a couple of times a year. I have had an abundance of good duck eggs all winter and now heading into early spring (when the fertility situation should improve), and this was a waste waiting for the Muscovy to go broody. Perhaps when it warms if she begins building a nest I’ll let her pull some duty, too, but it was clear that as far as reliability and hatch yield went, incubation is really the way for me to go.

We have been raising and processing meat birds and ducks for several years now (ducks just the last two). This new adventure into incubating and hatching is just one more way to build our ability to be self-sustaining and to economize our homegrown food source. The meat birds I always buy as chicks because of the stock that they are, but with the ducks, at least, I can build a breeding stock that can sustain us (more on the economics, etc. of that another time).

So as not to belabor this post too long, I’ll save for another day the discussion of my incubating setup and process and other related topics of (hopefully) interest. For today my point was just to share with you that I have had our first successful hatch! It’s been a very fun, interesting, and I can admit it–exciting process that I have also shared with the kids, and we’re all learning lots and having a great time with it.

A Layer Flock Is Born

The first of my home-hatched flock actually isn’t even ducklings, funny enough. I do have 3 duck eggs in the incubator which are due to hatch, if all continues to go well, next Monday. When I set those ducks, though, I also nabbed up some chicken eggs because I do have a couple roosters in with the layers to keep the peace and I knew there were some fertile eggs in the mix. Chicks have a shorter gestation period (21 days) than ducklings, so they came first. I ended up with seven that went into “lockdown” with a hatch due date of Monday (Feb 11). So far we have had five hatch successfully and two that pass the “float” test for viability, but which I am playing a game of wait-and-see with because they are yet to pip (almost 24 hours after expected hatch) and don’t seem to be doing too much. It’s www.thehomemadehomestead.comstill a pretty fair outcome considering how early in the year we are and the diminished activity of poultry in terms of breeding and laying this time of year.

So as it turns out we should be on our way to producing not only our own meat duck flock, but our next generation of layers as well (although no doubt we’ll have a number of roosters in this set that will be a meat resource, too).

That’s our bit of news for the day and I hope you’ve enjoyed the pictures! More on the specifics of the process in future posts, and please do ask any questions that I might be able to help you with to get you started in incubating your next flock!

Like this post? Then be sure to SUBSCRIBE so you don’t miss out on more!