A Fast, Simple, Delicious Elderberry Refrigerator Jam Made from Dried Elderberries
Got 30 minutes and some dried elderberries? Then you’ve got elderberry jam!
Got 30 minutes and some dried elderberries? Then you’ve got elderberry jam!
There’s no faster or easier elderberry jelly or jam recipe. Since it’s a refrigerator jam, this recipe requires no canning or processing after the jam is made. Fill the jars, pop in the fridge, and you’ve got one more easy way to incorporate the goodness of elderberryinto your everyday diet.
There’s no faster or easier elderberry jelly or jam recipe. Since it’s a refrigerator jam, this recipe requires no canning or processing after the jam is made. Fill the jars, pop in the fridge, and you’ve got one more easy way to incorporate the goodness of elderberryinto your everyday diet.
1 ¼ C honey (may substitute sugar, but reduce to 1 C and increase additional water to ¾ C)
Instructions:
Measure the ½ cup dried elderberries into a small glass bowl or two-cup glass measuring cup. Add the ¾ cup cold water to the dried berries. Cover and refrigerate overnight (or eight to twelve hours) to rehydrate berries. (Alternatively, if you are short on time, you may bring the water and berries to a low boil and then simmer for 10 to 15 minutes. Time permitting, rehydration is slightly better with the overnight cold-soak method, but either method will work. Read here for more on how to rehydrate dried elderberries for recipes.)
Pour the rehydrated elderberries and any remaining juice/water into a medium saucepan. Add the lemon juice and additional ½ cup water, stir to combine, then bring to a boil.
Remove from heat and carefully transfer the mixture into a blender or food processor. Keeping your hand on the lid of the blender, blend the berry mixture until a smooth, uniform consistency is reached (a few minutes).
Return the blended mixture to the pan. Sprinkle the powdered pectin over the berry mixture. Let rehydrate for one minute and stir to incorporate.
Stir constantly while heating and bring the mix to a full rolling boil that cannot be stirred down. Turn off the heat. Add the honey (or sugar). Stir to combine.
Heat, stir, and return the entire mixture to a rolling boil. Continue to boil for one minute, then remove from heat. Skim foam if necessary.
Pour the hot jam into jars. Cap and let cool for several hours. Refrigerator jam must be stored in the refrigerator, even before use, and is not considered shelf-stable at room temperature as it is not a canned product.
Yields three, eight-ounce jars of jam.
*This recipe originally appeared in The Complete Elderberry Tea Book. It has been adapted from a recipe from Frontier Co-Op, with changes made to improve sweetness and instructions. Enjoy!
*This post may contain affiliate links. Affiliate links help customers shop ad help support the costs and maintenance of this website by proving a small percentage income of sales to the site owner/affiliate, which helps to make this website and information-sharing possible. Affiliate sales do not increase the cost of products to buyers who utilize the convenient links included in this article. Thank You for your support!
This is not the first year that I’ve dried vegetables to preserve them, but I certainly did more of it this year than any previous year. There are many benefits to dehydrating vegetables for preserving, and once you’re hooked you’ll wonder why you never did more of it before (I know I certainly do!).
One of the reasons that people don’t do more dehydrating is a very simple one—we don’t know what to do with those vegetables once we’ve got them dried. It’s a question that I see and am asked quite often. And so, along with learning more about the actual drying process, I’m always looking for ways to use dried produce. After all, if we don’t use it, then what’s the point?
Using Dried and Dehydrated Tomatoes
It’s a lot to take on how to use all types of dried vegetables in one article. It makes more sense to break it down into individual vegetables (and fruits, too). Actually—and you’ve probably heard this before—tomatoes, the subject for today, are fruit. But we know we really all consider them vegetables.
Tomato, tomaaato, fruit or veggie—what can you do with dried tomatoes?
You might not think so, but dried tomatoes are one of the easiest dried vegetables (fruit) to use. Dehydrated tomatoes reconstitute easily, which is key in maximizing their use. The easier it is to bring your dried produce “back to life,” the easier you’ll find it is for you to use them. It also helps that you don’t actually need to reconstitute tomatoes in order to use them (but just in case, there are instructions for that below).
That said, here are some of my favorite ways to use dried, dehydrated, and sun-dried tomatoes. Regardless of what method you used to dehydrate them, these uses will work for all properly preserved dry tomatoes:
Tip: consider any dried or dehydrated tomatoes just as good as “sun-dried,” and use them interchangeably in recipes.
“Sun-dried” Tomatoes in Oil. Very simply, use whole slices or break up into any size pieces (I find about ¼ to ½ inch something easy to chew after-the-fact). Place the tomatoes in a jar and then cover with olive oil. Add any herbs or spices you like. I love adding fresh or dried garlic cloves and some salt. I’ll frequently add in pepper (white or red pepper flakes are delicious) and basil.
This oil should be refrigerated for safety’s sake, which may cause the oil to coagulate, but if you leave the jar out at room temperature for a while before serving, or warm it a little, it will come right back to its fluid state. Prepare this oil several hours to days before you want to use it to get the best flavor infusion and some softening of the dried tomatoes (in this constitution they do not get as soft as cooked tomatoes so expect them to be a little crisp and chewy).
From here, there are many ways that you can use this infused oil, and/or the tomatoes. You may strain the tomatoes and vegetables from the oil or keep them in suspension, or you can remove just the tomatoes and use them. Some favorite ways to use the oil and/or the tomatoes are: as a dipping oil, salad dressing, on pizza, in stir-fries, as a marinade or tossed into pan-fried, sautéed, or roasted chops and meats.
This oil makes an excellent alternative to full-on pasta sauces—light, delicious, not overpowering, easy on the stomach, still with good tomato flavor…almost like a fast and easy sun-dried tomato pesto. It is an especially good pairing for veal and chicken but will do well with a number of meats, and of course with other vegetables!
Rehydrated for sauce. Tomatoes rehydrate very easily (see below), so rehydrating them and then pureeing or using for any sauce recipe is simple. Rehydrate, puree, season, simmer. Simple!
Dried tomato powder. Place dried tomatoes in a blender or food processor and process until pulverized into a powder. You can make the powder ahead to have on hand for everyday cooking.
Tomato powder works well as a thickener similar to tomato paste, as a seasoning for soups, stews, or roasted meats and vegetables, added to beef bone broth (really helps mellow the beef bones!), or added to vegetable juices.
In any soup, stew, or chili. Tomatoes rehydrate so easily that you don’t even need to rehydrate them before using them in these dishes. Just throw them in in a measure close to what the rehydrated to fresh equivalent would be (see below).
Rehydrated for salsa or Pico de Gallo. Rehydrate as per below, and use in place of fresh tomatoes in your favorite salsa recipe.In rice dishes. Easy. Add dried tomatoes in when boiling the rice, using a little extra water.
In omelets, casseroles, and other dishes. For these recipes, you can choose the form you think will work best—as a sun-dried type, in oil, rehydrated, or allowed to rehydrate in the cooking. Tomato is a great flavor for many of these types of dishes, and dried or dried and rehydrated tomatoes work excellently as well!
How to Rehydrate Dried Tomatoes for “Fresh” Tomato Recipes
To rehydrate dried tomatoes, place tomatoes in a bowl and add enough warm water to cover the dried tomatoes. Cover and let sit for one hour (or overnight in a refrigerator), and then use in cooking just as you would use canned or sliced/chopped tomatoes. If preferred, drain off excess water (though it can make a nice flavoring in soups and rice dishes, and if making sauce a little liquid to puree is not unwelcome).
The only real question left, then, is how do you know how much or how many dried tomatoes to use for the “fresh” yield you need? Here are some yields and equivalents to go by:
• 1 pound of fresh tomatoes will yield about 1 cup of dried tomatoes • Use 1 cup dried tomatoes for every pound of fresh tomatoes a recipe calls for—rehydrate according to use • 1 cup of rehydrated tomatoes equals 1 ½ cups
Recommended Reading for Drying Tomatoes, Using Dried Tomatoes, and Preserving Other Dried Foods
I strongly recommend this book for either drying fruits and vegetables or for resources and ways to use them after the fact. It is a very comprehensive guide, a “Bible” of sorts for preserving foods. It takes you all the way through from preserving to use, including a number of good recipes. Published by the reputable, reliable Storey Publishing house:
*This post may contain affiliate links. Affiliate links help customers shop ad help support the costs and maintenance of this website by proving a small percentage income of sales to the site owner/affiliate, which helps to make this website and information-sharing possible. Affiliate sales do not increase the cost of products to buyers who utilize the convenient links included in this article. Thank You for your support!
Make “Fresh” Elderberries or Elderberry Juice From Dried Elderberries
Get the Answer to How Much Do Rehydrated Elderberries Yield? (Berries and Juice)
We see plenty of articles and posts about using dried elderberries, and even plenty about how to dry or dehydrate elderberries. But what seems a lot harder to find are instructions for how to rehydrate elderberries.
Here are some simple instructions for rehydrating elderberries (based on instructions in recipes by Frontier Co-Op). You can use these instructions to “make” elderberries that are close to fresh from dried elderberries. This will give you a yield of plump, juicy berries that you can use in any elderberry recipes, and/or juice for elderberry syrup, jellies, jams, and more.
How Much Water and How Much Elderberry?
To rehydrate elderberries for recipes and juice you will use:
There are two methods for rehydrating elderberries, a cold soak method and a hot soak method.
Cold Soak Method to Rehydrate Elderberries:
Pour 3/4 cup fresh cold water over 1/2 cup dried elderberries. Cover. Place in the refrigerator and let stand to soak overnight, or for about 8 to 12 hours.
Hot Soak Method to Rehydrate Elderberries:
Place 1/2 cup dried elderberries in a heat-proof bowl, such as a stainless steel mixing bowl or Pyrex dish.
Carefully pour 3/4 cup boiling water over the dried elderberries.
Hold for a minimum of 15 minutes for water to be absorbed. Thirty to 45 minutes is better.
Let stand until berries are tender, close to normal fresh berry size, and much of the water is reabsorbed. All of the water will not be absorbed by the berries and this will be your “juice”.
Berry and Juice Yield from Rehydrated Dried Elderberries
How many cups of berries will you get from rehydrating elderberries? How much juice will one half cup of rehydrated elderberries yield?
You will find only a slight difference between rehydrating elderberries with the cold soak method and rehydrating elderberries with the hot soak method. The yield is slightly better with the cold soak method, but the difference is really negligible.
As the pictures show, your yield of berries versus elderberry juice will be:
Elderberry rehydration yields.
1 (scant) cup plumped elderberries
2/3 (brimming) cup dark elderberry juice
This yield is similar to what you would get from thawing a cup of fresh-frozen elderberries and so it would be fair to say that this conversion would be appropriate for use in recipes calling for one cup of fresh elderberries.
Using Rehydrated Elderberries and Juice
To use the rehydrated elderberries in recipes calling for fresh berries, simply strain the juice from the berries and use the rehydrated berries in place of fresh. The juice can be used in elderberry syrup recipes or jam recipes by measure.
If you are looking to yield more juice for a recipe and do not need the plumped berries, mash and strain the elderberries to release more juice. If you are just straining the berries without mashing them, reserve them for use in another recipe (maybe make some elderberry muffins!). Store in the refrigerator but use within a few days.
What is the Best Way to Rehydrate Elderberries?
Is one method better for rehydrating elderberries? Should you use the hot soak method or the cold?
As mentioned, the yield is not a lot different, so use whichever method fits best given your available time. If you have the time to plan ahead, though, the cold-soak method inches out the hot soak method and is preferable for a couple of reasons:
While the cold soak method is slower, it results in less nutrient and vitamin loss, and therefore preserves more of the natural goodness and nutrition of the elderberries.
The cold soak method results in slightly plumper berries, with slightly better water absorption.
It should be noted, and this is a very important point, that the heat-soak method with the boiling water essentially “cooks” or heat-treats the elderberries. It is not considered safe to consume raw elderberries. If you are not using the elderberries in a recipe that will be baked or cooked, then the heat-soak method is the way to go.
The potentially harmful compounds in elderberries are found in the bark, leaves, unripe berries, and seeds. Therefore, if you are removing all of the seeds and berries via straining anyway, it is not as important to cook or heat treat the berries.
Overall, if you have the time, go with the cold soak method, but keep these points in mind when choosing.
*This post may contain affiliate links. Affiliate links help customers shop ad help support the costs and maintenance of this website by proving a small percentage income of sales to the site owner/affiliate, which helps to make this website and information-sharing possible. Affiliate sales do not increase the cost of products to buyers who utilize the convenient links included in this article. Thank You for your support!
*This post is Part 2 of a series that will take you from the very beginnings of starting seeds in a small space, such as a home, apartment, or backyard greenhouse, all the way through to getting your young plants ready to plant outside. See the other posts in this series for a complete guide on how to start and grow seeds in the small space of a home or apartment (useful for small-scale greenhouse growing, too!)
Now that your seedlings are up, it’s time to start potting up.
What Does It Mean to ‘Pot Up’ Your Plant?
Potting up means pretty much what it sounds like. When you “pot up” a plant, you transplant it into a larger pot. In the case of starting seeds and small-space seed starting, you are going to gently separate those small seedlings and plant the into individual pots so that they can grow to transplant size, ready to be planted outside into your garden, raised bed, or patio containers—whatever your case may be.
Why Pot Up Seedlings?
Starting seeds in bulk containers helps us get the best, most viable seedlings started to transplant into individual pots and thus, eventually, plants. This method is all at once a quick-start and small-space saver, but more importantly, it is a way to get only viable seeds started, thereby selecting out poor seeds and their future inferior plants in the process. The seedlings were never intended to spend their entire potted lives in these bulk pots. The plan all along was to pot them up for vigorous, individual growth.
The next step, therefore, must be to pot up the plants to give the best of them, our best possible crop, space, soil, water, air, and nutrients to grow.
What Type and Size of Pots to Use to Pot up Plants?
When it comes to pots and options to plant garden transplants in, there are a number of options, many of them good. There’s a good chance you’ve seen lots of ideas, even up-cycled vessels, online that can be utilized. The short version is that most any individual pot or cell that is two to three inches deep by one to two inches wide that has good drainage is adequate.
Whether you choose peat pots that go into the ground, paper cups, “pill” type expanding plant pellets, small single pots, or multi-plant plastic cell packs is up to you, as long as the pot fits the bill for potting up.That said, my recommendation is to use those plastic, multi-cell plant cell packs. If you truly want to avoid plastic, there are biodegradable peat-pot versions of them as well, but I do tend to find more ripping and tearing and degrading before transplant time with these (still not a horrible option).
My preference for plastic cell packs is based on:
Ease of use.
Reasonable pricing.
Compact yet adequate spacing for small-space plant growing.
Recyclability—both in that the material is recyclable when it is no longer in good enough condition for planting, but also in that with proper care, cleaning, and storage you can generally use the same set of cell packs for many seasons.
Compatibility with standard plant trays.
Ease of watering and maintenance with other standard components.
What size plant cell packs are recommended?
One 10×20 plant tray can hold enough cell packs to plant up to 48 individual plants if using a standard 6-cell pack. The same tray will hold 32 plants if using a 4-cell pack.
Either is perfectly adequate and the cost difference is negligible, if at all, so at this point it really comes down to preference and plant quantity.
For small-space seed starting, 6-cell packs are probably the most sensible. If you have the extra space, four-cell packs give a little more room for plants to grow without tangling later on.
In the gardening world, 6-cell packs are called 806 tray inserts/cell packs and 4-cell packs are called 804 tray inserts/cell packs.
If you search accordingly, you will come up with them quickly. A full set of inserts usually costs around $5 per tray (32 to 48 cells).
Potting-Up Supply List:
You may have many of the supplies you need already, because many of them will be reused from the seed germinating stage. Now is the time to take a count of how many of each type of plant you are planning for your garden and buy your pots or packs accordingly. You will need:
Potting Soil
Pots or cell packs for the quantity of plants you are planting
Whereas for germinating seeds we used a specific seed-starting soil, now is the time to move to a labelled potting soil. Potting soil does contain more organics and some fertilizer that the growing plants will need, which seedling soil does not. All you are looking for is a good-quality potting soil that is not too sandy or too filled with large mulch and pieces.
Most good-quality commercial potting soils will fit this bill as long as you don’t go for total bargain-basement substandard soils. It should be a soil that does not compact too much and that contains enough peat or good organics to uptake water and hold moisture. Potting soil is not overly expensive—under $15 for an eight-quart bag, which is enough for most home gardeners, depending on plant quantity.
When to Pot Up Germinated Seedlings
Once your seeds have germinated you should move them to a warm and light place (under your grow lights or near or on a bright windowsill is find, just be sure they are not close so as to be burned by heat-generating grow lights). Generally speaking, you should let these young seedlings grow for one to two weeks before potting them up. This gives them time to grow some reliable roots for the transplant.
Two signs will tell you that your seedlings are developed enough for transplanting.
One very reliable sign is when you see the first “true” leaves starting to develop. These are NOT the FIRST leaves you’ll see.
The very first leaves you will see are the cotyledon leaves, which are actually part of the plant embryo and are an early food source for the new seedling. In time you will start to see very small leaflets develop in the center or above these leaves. Seeing these tiny leaves is a sure sign that your seedlings are ready for potting up.
In the above image, note that the round bottom-most leaves are the cotyledon leaves, and the very small, pointed leaves emerging in the middle are the first true leaves.
Some seedlings take quite a while before you see these “true” leaves, and/or the seedlings and leaves are very small, making it hard to discover them. And so, I do not always wait for these leaves before moving ahead and potting up the seedlings of all varieties. As long as the seedlings have more than one single root, where you can begin to see branching in the root, your seedlings should be developed enough to withstand the potting up process.
To determine root development, you will have to pry up gently on an edge seedling ad take a look at the root structure, then use our own judgement.
(I should say here my personal experience has been that even very young and under-developed seedlings have, for me, successfully transplanted as long as they have lived about two weeks since germination and have some notable roots).
You will have flexibility, even of a couple of weeks, giving you enough time to pot up your plants even if some life something interferes on the ideal week or weekend. Just note that at some point the crowding of the germination pot will stunt seedling growth and waiting too many extra weeks will mean that you are inhibiting the plant’s growth by not separating it and giving it room to individually grow and thrive. So while a little delay is okay, a long delay will delay the development and growth to outside transplant size that you need for future planting and result in delayed harvesting.
How to Handle Seedlings When Potting Up
Always handle seedlings and transplant by the leaves and not the stems when working them. The stems are the weakest part of the plant. You might not expect it, but the leaves and leaf attachment are actually very strong on a plant.
By holding and handling your seedlings by the leaves and never by the stems, you will minimize breakage of seedlings when potting them. You’ll soon come to find that these little powerhouses are much stronger than we give them credit for when properly handled by the leaves and not the stems!
How to Pot Up Garden Seedlings
Step 1. Prep your potting soil.
Prep your potting soil for potting just like you did for germinating seeds. Moisten the soil and loosen it (if compacted) or mix it through. You want the oil to be slightly moist, but not soaked and not clumping.
Step 2. Set up inserts and trays.
Assuming you are using cell packs and a daisy tray, insert one set/tray of cell-packs into one daisy tray.
Step 3. Fill with soil.
Fill the entire tray of cell packs (or containers if using something else) with soil. Fill even with the top of the pack (soil will compact when watered).
Step 4. Separate seedlings.
Use a pencil, popsicle stick, skewer, or similar tool to gently pry under an entire row or clump of seedlings, then pull them apart as follows:
Remove an entire clump or cell of seedlings at one time and then work them apart. You’ll be surprised how easily they come apart without harm if you follow these instructions.
Handling seedlings individually by their leaves, gently but firmly pull the clumped seedlings apart to separate the roots.
While this sounds harsh and unrealistic, be assured that the seedlings will easily handle this and the roots will separate very easily. Yes, it sounds like they shouldn’t, but they certainly do!
Step 5. Plant into individual pots or cells.
If using cell packs, plant one type of plant per 4- or 6-cell pack, or one plant per single pot. Plant as many different packs and as many different types of plant per tray. Make a hole in each soil-filled pot or cell (pencil, marker, or just your finger will work just fine for this!). Make the hole fairly deep. The length of the stem and roots will dictate this, but you want to plant the seedlings almost up to the lowest leaves, with just a short section of stem exposed below the leaves, above the soil line.
Seedlings planted inside tend to get long and leggy in the stem, longer than you want them to be for strong stem and plant growth. You will do no harm to the seedlings by planting these young stems deeply. In fact, you’ll do them a favor! This is your chance to correct that legginess!!
Plant the seedling to a little lower than leaf-level. It helps to think of it this way—the growth of the plant will basically occur above the existing leaves. So, you want that base to be low and sturdy relative to your pot.
This is how I have potted up my seedlings for many years, and it is a method that has always treated me well!
Step 6. Label the pack or pot.
Be sure to immediately label each cell pack or pot. Don’t rely on your memory or seedling recognition—things change quickly and many plants and seedlings look similar as they develop!
Step 7. Bottom water with optional diluted fertilizer.
Once you have an entire cell or tray ready, place the pack in a tray of water and bottom water as you did when you started the seeds to germinate. Leave the pack in the water and let it absorb the water from the bottom up. Leave it in the water only until the top of the soil turns evenly dark with moisture, and then remove.
The potting soil you use should have an adequate amount of fertilizer in it to maintain the seedlings for the first couple of weeks, however, it is often recommended, and results in stronger plants, to add a diluted strength of liquid fertilizer to the water when you transplant your seedlings. This will give them a stronger start, faster growth, and more quickly developed root system.
A good, all-purpose liquid fertilizer will work nicely. Read the instructions to determine the normal dilution strength, and then cut that by 50%. Your plants will need regularly-scheduled fertilization in the weeks ahead.
Step 8. Provide good light.
Plants that have been potted up immediately require good, full-spectrum light that is not too far away, provided for most of the day. If you have a bright, sunny, natural light source you may be able to forego providing artificial light. If you start to see your seedlings becoming very “leggy” and long, or if your plants look yellow or yellow-green, you may need to consider providing an artificial light source, as your natural light source may not be bright enough or strong enough to develop the strong, stocky, free-standing plants that you need for transplanting outside.
Pot Up Until the Potting Is Done!
Different types of seeds germinate at different speeds, and so it may be that you will need to have a few “potting up” sessions until all the seeds are individually planted for your garden.
Once this is done, your young plants will need observation, light, fertilization, and maintenance until the time comes for hardening off and transplanting your young starts out into your garden space.
Enjoy this time as you watch your seedlings grow, and continue to follow along here for more information on maintaining, fertilizing, lighting, and then getting your plants ready for the rigors of outside living!
*This post may contain affiliate links. Affiliate links help customers shop ad help support the costs and maintenance of this website by proving a small percentage income of sales to the site owner/affiliate, which helps to make this website and information-sharing possible. Affiliate sales do not increase the cost of products to buyers who utilize the convenient links included in this article. Thank You for your support!
*This post is Part 1.5 of a series that will take you from the very beginnings of starting seeds in a small space, such as a home, apartment, or backyard greenhouse, all the way through to getting your young plants ready to plant outside. See the other posts in this series for a complete guide on how to start and grow seeds in the small space of a home or apartment (useful for small-scale greenhouse growing, too!)
There is a bit of an interim step between the germination stage and the potting up step of this small-space seed-starting method. The timing of this step will be different for different types of vegetables and flowers, because they all have their own internal clocks; their individual timelines to germination.
Germination Begins
About a week after planting you will see the earliest-germinating seeds start to pop above the surface. It starts with one or two and then over the next couple of days quickly becomes a pretty virulent pot of popping seedlings. Sometimes, given the high density of seed in the pot with this method, you will even see the mass of seedlings lifting up an entire layer of dirt, looking like they are wearing something of a seedling cap.
When you only have one or two seeds popping, you can continue on as you are, monitoring moisture and keeping them in the dark. They’ll look a little anemic and yellow at this point, but that’s okay. These just-germinating seedlings don’t need to photosynthesize yet, and you’ll get a better overall yield by keeping them under germination conditions for another day or three.
*The one exception to this rule is things like cucumbers and squash—those larger seeds which we discussed starting preferably in individual peat or paper pots, that will not be potted up. For those seedlings, remove them from the dark and put them in a bright space as soon as you see them break the surface of the soil.
These seeds grow very quickly and if left in a dark space for even a day longer than necessary, will grow a long, leggy, weak stem.
Since you are not potting these seedlings into new pots, you will not be able to correct this in the transplanting. By putting them to the light as early as possible, you will prevent this legginess and weakness.
Show Them the Light
When you have several seedlings that have emerged—something that looks to you like most of the seed has begun to germinate and break through—you can now move the seeds out of their makeshift germination “chamber.”
Take only the germination pots with plenty of emerged and emerging seedlings and bring them out of the dark. Place them in a space with plenty of light and warmth. If you have your grow lights already in place, you can set your germinated pots under them—just don’t place the light too close to the pots, as these young seedlings can still easily dry out and can easily burn if the light is too hot. If your lights are not set up yet, place them in a bright space or on a sunny windowsill. Just take care that the light is not too bright or too hot, which again, could cause the tiny plants to dry out and burn.
Though soon enough the right light will be important for strong stems and good growth, at the early in-between stage a bright place that is maybe a little less than optimal in the light department is okay.
The subsequent “potting up” step will correct a lot of early issues anyway, and your plant is not really making its own food yet, so its needs are less.
Simply moving them into a well-lit room will be enough for the time being.
Within a week you will want the seeds under grow lights, but this gives you a bit of a breather while the seedlings are slow-growing to get the lights set up and let the just-germinated seedlings mature for the next step, potting up into individual plant cells or pots.
Keep Germinated Seeds Warm, Wet, and Draft-Free
Really, the heading says it all. To maintain your young seedlings at this stage, all they really need is for you to maintain them in a bright, warm, space protected from drafts, and to keep their soil wet—but not too wet!
As before, soil should be kept moist and should not be allowed to dry out. Seedlings will die off quickly if their soil is allowed to become dry. Bottom-watering is still best, and you should still only water until the top of the soil just darkens with moisture. The seedlings will tolerate over-watering better than under-watering, but they still will not tolerate over-watering that well. Over-watering is a prime factor in rotting and disease. Do not let the soil get so wet that the pot is sopping or dripping.
In terms of “warm,” comfortable room temperature, perhaps a little on the warmer side of things, will be enough to maintain your seedlings until it is time to pot them up. Something above 65F and in the range of 65-75F is a good, comfortable temperature for a seedling—about the same temperatures that you kept them at for germinating and sprouting. You do not necessarily need to increase the temperature of your home to achieve this. Selecting a spot closer to a heat source (but away from direct-blowing hot heat) will be enough to increase the seedlings’ climate those few degrees.
Just A Little Longer Until Potting Up
This interim stage will only last for about a week or two, and then it will be time to move on to the next stage, when it will be time to split these little seedlings into individual pots or cells of a cell pack to live on their own.
This is where it starts to get exciting—where you’ll start to really see these sprouts as plants with promise, well on their way to gaining size and stature, ready for planting out in your garden in another month or so.
Be sure to subscribe and follow along so that you don’t miss a post of this series. Together, we’ll move through this process of small-space seed starting. You’ll be amazed at just how much you can grow in even the most limited of space!
When to Start Seeds Indoors, What to do If It’s A Little Late for Seed-starting, When To Plant Outside, and More
Part One of this series gave you the how of how to start seeds at home in a small space. Along the way, you’re sure to have questions. Questions like…
…When to start garden seeds? Can you start seeds if it’s later than the recommended start-by date? When should you plan to plant your vegetable plants outside? And, Where can you find dates and information specific to your location?
You have questions; we have answers, and tips for finding location-specific resources, too. In this post we’ve tried to fill in the blanks and anticipate the questions you might have, and also share some tips and tidbits worth knowing. Should you find yourself with more questions in the end, please use the comments section to let us hear about them!
Seed-Starting Questions and Answers
When Should I Start My Garden Seeds?
Knowing when to start your vegetable or flower seeds is important. You don’t want to start them too early or you’ll have root-bound plants that become too large for their pots; too late and you won’t have enough time left in your growing season to enjoy your harvest. So, when is the right time for seed starting?
The garden growing season in the US and North America does vary, obviously, by geographical location. In other words, gardening starts earlier in the more southern regions and is successively later as you move northward.
Start Seeds 6 to 8 Weeks Ahead of Planting
Generally speaking, you should start most garden seeds six to eight weeks before the date that you plan to plant them outside in your garden (or patio containers in the case of more urban gardening situations).
There are some exceptions to this “rule,” a few of which are discussed in subsequent questions (and some ways to overcome them), but in general your most common garden vegetables, and even most flowers, will yield for you if started inside within this time frame.
How Do I Know When to Plant my Plants Outside?
Every location or gardening zone has an accepted date that is considered “the” planting date to start planting plants outside, based on frosts and temperatures. To make life easy, beginning gardeners should focus on this date as their planting date.
This general planting date is what is called your “last frost date.” This is the date that it is generally considered “safe” to plant annual plants and vegetables outside. After that date, your area is not expected to have a frost again until the fall and the change of seasons, so those plants you transplant out into your garden space should be fine with the temperatures for the remainder of the growing season. For example, in Massachusetts, the long-standing rule of thumb is to use Memorial Day as the start of the outside planting season.
To find your last frost date, you can search for the last frost date for your location. Resources such as the Farmer’s Almanac Last Frost Date Interactive Map are very helpful. You can find that here: https://www.farmersalmanac.com/average-frost-dates
Each state’s state university system also has an “extension service,” and these services are excellent resources for both commercial and home growers, specifically tailored to your region.
What If It’s Past the Six-Week before Frost Date?
Many people who will be planting gardens and who are starting seeds this year didn’t actually plan to do so until life was rather flipped on its head. So, there are lots of us out there scrambling now to start seeds for a previously unanticipated garden. And so, maybe it’s already inside your six- to eight-week seed-starting window. Does that mean you cannot start your seeds?
It actually does not mean that at all. The advice to plant out just after the last frost date is advice given to maximize garden production time and, moreover, to protect tender vegetables and flowers from the dangers of frost and freezing temperatures. The timeline of six to eight weeks is what is needed to get the plants large enough and strong enough to tolerate transplant shock and outdoor conditions. But that doesn’t mean that you can’t still start seeds and grow your own food if you are a week or two past that date, potentially even as much as a four week difference (and longer in warmer regions).
While six to eight weeks ahead may be ideal, you can still start your seeds. You may just need to plant them outside a couple of weeks later than your area’s first planting date. As long as you have plenty of growing season left after you plant those plants outside, you will still get a very productive, viable crop. All your mainstream garden vegetables will have more than enough time to grow and produce in abundance even if planted a little late.
If you have questions about a specific variety, plant, or crop, again, refer to your seed packet. All the important growing information can be found there, including time to harvest. Look at the number of days you need before your crop is ready to harvest. If you’ll have at least that much time left in your growing season when your plants will be ready, you have enough time left to start your own garden seeds.
Your harvest might begin a couple of weeks later, but there is certainly nothing “wrong” with that. For our own personal reasons of time and availability, there will be lots of us planting later than the start date, anyway. Don’t let a week or two dissuade you from growing your own, fresher, cheaper, better, vegetables and flowers!!
Are There Plants That Get Planted Before the Last Frost Date?
The short answer is “yes.” But you also don’t have to. Whatever does that mean?
There are a number of cold-hardy vegetables and plants that have their own personal planting date. Peas, for example, prefer growing in colder weather. And so ideally, peas would be started even earlier than when you would plant out a warm-weather-only crop like tomatoes or peppers. Depending on your winter or spring, this might be as early as six weeks earlier.
In general, this early planting doesn’t apply to flowers and herbs almost at all, with so few exceptions it’s probably not worth the focus in this conversation. However, cole crops —broccoli, cabbages, cauliflower, kale, lettuce, spinach, Brussels sprouts—are all plants that can, if well-started, well-established, and properly hardened off, be planted outside before the last frost date.
You do, however, want to consult your seed packet for tolerable temperatures. These plants can take some cold, but do have a lower limit to their ability. Turnips and radishes are also considered cole crops that can be planted before your last frost date, but these seeds should be sown directly in the ground and not started inside in pots.
Now, just because these crops can be planted outside earlier than the last frost date, that doesn’t mean you have to. If you’re not ready to start gardening early, or if you just prefer to start everything at one time, you can certainly choose to do that, too.
Are There Plants that Need More Than 6 to 8 Weeks to Grow Before Planting?
Yes. There most definitely are some plants and seeds that require a very long indoor start and growing season and which, even with a later planting date, really can’t be done with a late start.
These are plants that require starting from seed more like 12- to 16-weeks ahead or you will simply not have enough time to grow them to harvest regardless. Some typical vegetables and seeds in this category include onions from seed, celery, some flowers, and a number of herbs.
However, this doesn’t mean that you can’t grow them as part of your garden for this year—you just need an alternative that can grow within your growing season. Here are a few examples of common garden vegetables that you might not be able to grow from seed, but that you can still start in your garden in the spring at planting time, along with the alternative options for starting them:
Onion starts or sets (grow from small baby onion bulbs, called “sets”)
Seed potatoes—seed potatoes are not literally seeds, they are potatoes with sprouting eyes from which new plants will grow
Sweet potato slips—typically you will have to purchase these slips from a garden center or order them online
Purchased, started plants—In the later stages of the seed-starting season, things like celery, celeriac, and many herb plants are better if purchased from a garden center or from a greenhouse that started them in the winter months. (which is perhaps not as cheap or as gratifying as growing from the seed up, but which is still an economical option as compared to grocery store produce that helps you fill in the blanks for this year—and maybe next year, with this year and experience under your belt, you can plan ahead and expand your seedling repertoire!)
All of these starts are available at most commercial greenhouses, garden stores and/or through online ordering from seed and garden companies.
What Are Garden Zones and What Do Growing Zones Mean to Me?
Gardening zones, or more accurately plant hardiness zones,refers to a geographical climate-based zoning system developed by the United States Department of Agriculture (USDA) as a climate and planting guide for locations throughout the country. Many countries have since used this system to develop their own location-specific guides for planting and plant hardiness. The zones are numbered 1 through 13.
It is very easy to find your hardiness zone, and once you have it you can use it to reference seed and planting information for your specific location. An interactive map is available online at the USDA website. Just click on your location to find your zone. Knowing your garden zone will help you plan planting dates, learn about season length, and also choose plants that are capable of growing to harvest in your location.
What Types of Seeds Can I Start in a Six to Eight-Week Window?
With few exceptions, most of your more common and more commonly-used vegetables, and many flowers, can be started and grown to transplant age within 6 to 8 weeks. Broccoli, cauliflower, tomatoes, peppers, cabbage, certainly any greens like lettuce or spinach, all make the list, as well as many others.
Flowers will do better if started earlier than 8 weeks and may be a bit on the small side if started in 6 to 8 weeks, but in this timeframe you can get most flowers at least large enough to plant outside, where they will catch up and have time to come into flower, if a bit delayed. Some flowers will even do well if direct-seeded outside when the weather warms above freezing (cosmos and zinnias are nice cut flowers that do well as direct-seeded plants or when pre-started inside). And still others prefer NOT to be started inside at all (see below for more on that topic).
Some herbs can also be fit into this 6 to 8-week window, though they’ll do better on the longer end of the spectrum. Basil can pretty reliably be grown to transplant stage within 8 weeks, as can sage, chives, parsley, cilantro, and dill (though dill is a good candidate for direct-sowing, too).
Are There Plants That Should Wait and Start Closer to a 4 to 6 Week Pre-frost Period?
Some types of plants don’t actually do all that well in pots and/or with transplanting and for that reason, they actually will do better if they are started later and live less time in pots. These are primarily plants that do not do well with potting up, and so for these plants it is best to start them in degradable organic pots (like peat pots) that can be planted directly in the ground.
Do not plan to “pot up” these seedlings at any stage and try not to disturb their lives more than necessary. Also, try to limit the time they do spend in the potted stage, and so plan to plant them about 4 weeks before you want to plant them outside. This gives them enough time to grow to transplant size and develop enough roots without outgrowing their pots and therefore not requiring potting up. You’ll still get the jumpstart on the season needed for earlier vegetables, but the plants do not deteriorate from too much time being potted.
That said, these are also often the seeds that will do well if directly sown in the ground, so that, too, is an option and you may choose to forego starting them inside altogether. They tend to be larger seeds and plants so it’s less of a worry that you will accidentally weed them out when they are young and they can compete well with whatever weed seeds they do encounter as young seedlings.
The plants to hold off on and start around the one-month-before-last-frost date are:
Cucumbers
Squash of any variety
Melons
Pumpkins
Are There Plants I Should Not Start Inside?
Definitely. For various reasons, and chief among them the fact that they just do not do that well germinating in pots and then being disturbed and potted up, it is recommended to “direct sow” some kinds of seeds. These include:
Carrots
Radishes
Beans
Peas
Sunflowers (sunflowers truly do not do very well when started and then transplanted; the time lost due to transplant issues ends up being little to no advantage over direct-sowing seed)
Beets
Other root vegetables like parsnips, turnips
Some seeds and plants can either be direct-sown or started inside, as discussed above. Examples include lettuces, spinach, cucumbers, squash, and melons.
How Much Space Do I need to Start My Own Seeds?
Not much. With a good seed-starting method, you really only need a couple of square feet of space to get your seeds started. When you split these germinated seeds into individual pots or cell packs, you’ll need a little more room, but even then you can achieve a great garden’s worth of transplants in the footprint of just a couple square feet if you “go up”—in other words, use plant shelves rather than trying to space everything out over a single surface.
Two 10×20 inch plant trays will fit 96 plants in 6-cell packs, in just 2 sq ft of space!4-cell packs, as shown here, will grow 64 plants in 2 sq ft!
For example, in two-square feet of space you can fit two 10 x 20-inch seed trays. Each tray will fit 8 cell packs, and you can use either 4 packs or 6 packs when it comes time to pot up individual plants. That means that each tray can fit either 32 or 48 individual plants. So in just one two-foot space you can grow as many as 96 plants for your garden! In this way and with the method laid out in this series of posts, it truly does not take much space at all to start plants from seed for either an urban or a country garden—no greenhouse required!
The other posts in this series will help you find the space you need for small-space seed starting. Start with Post One of the series and subscribe or continue on through the different stages as you go from seed to transplant time.
*This post is Part 1 of a series that will take you from the very beginnings of starting seeds in a small space, such as a home, apartment, or backyard greenhouse, all the way through to getting your young plants ready to plant outside. Start here today for seed-starting success, subscribe, and come back over the next week or two as we learn what to do at each phase of the growing process.
For so many good reasons, this virus is seeing droves of people turning to home gardening. Lingering concerns over supply, transportation and warehousing breakdown, availability, food security and safe handling, and questions of future cost and affordability are all real reasons people are looking toward being more self-sufficient. The demand for garden seed is proof positive that more people are planning to grow at least some of their own this year.
If you are wondering how you can start seeds to grow your own food in the space that you have, you’re in the right place!
Whatever your space, large or small, this seed-starting method is ideal for successful home gardening and healthy plant starts!
Here, we learn how to start seeds for the home garden with very little space required!
It’s a Very Good Time for Seed Starting
If there is one fortunate thing about all of this, it is that the time is just right for starting your seeds and planning your garden in most locations in the northern hemisphere. And you do not need a large sunroom, greenhouse, or other big space in order to do so. Even in an apartment, if you can spare a dedicated corner, table, or shelf, you can grow your own vegetables, plants, and flowers from seed and have more than enough to fill your patio or even a large garden. In fact, you’ll be amazed at just how successfully you can grow more than enough in a very limited growing area. Here’s how:
Gather Your Seed-Starting Supplies
For this small-space seed-starting method, you will need a few basic supplies:
Seed starting mix
Four-inch pots
Seeds
Plant labels
1020 plant tray (solid no holes)
1020 plant flat (webbed, “daisy flat”)
– Seed Starting Mix. Get a bag of seed starting mix, which is a little different than potting soil. You will not need a very large bag and a small 12-quart bag of inexpensive seedling mix is enough for most home gardeners (depending, of course, on how many seeds you’ll be starting).
Seed starting mix does not contain added fertilizer and is lighter and less dense than regular potting mix. It is also free of large chips and chunks, which are problematic for tiny seeds just getting started. Seedling mix allows seeds of all sizes to germinate and push their way to air and light without being hindered and dying off before they can break through.
Seed starting mix is highly recommended for plant germination but if you really cannot access seed starting mix and must use regular potting soil, sift it through a colander to remove large pieces, sticks, and chunks or chips of wood.
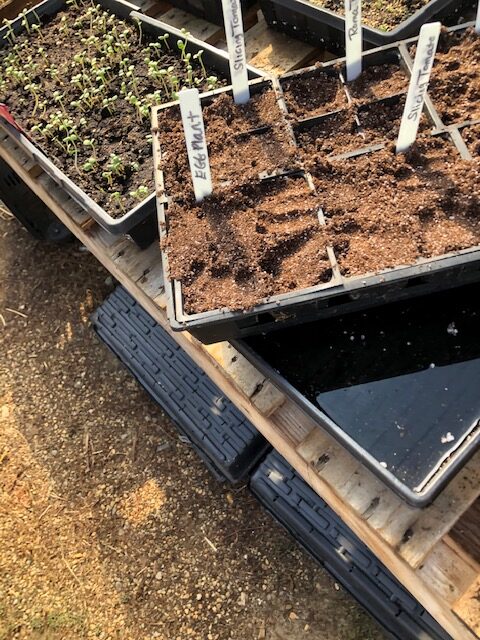
– Seed starting containers. At this stage all you need is something about four inches square that you can use to start each type of seed in. Four-inch square pressed peat or “cow pots” are ideal, however you can even use the segmented plastic cell-pack seedling pots, or even some disposable Tupperware or clean plastic takeout containers (if using recycled containers, make sure to punch drain holes in the bottom for watering and drainage). You will need one container per seed variety or seed type. See the pictures below for an idea of what will work.
– Seeds. Gather all the seeds for the different vegetables or flowers that you plan to plant.
– Plant labels. You will need something to label your pots. Plastic plant labels that can be written on with a permanent marker work best. Craft sticks or popsicle sticks may be used, too, but often wooden sticks end up blurring and can become unreadable when water is soaked into the stick.
– Large flat for watering. This can actually be a plant tray with no holes (such as the long, approximately rectangular 10 x 20 black plastic flats often called 1020 flats) or even a low, long, rectangular Tupperware or plastic storage container will do. Even a 9 x 13 baking pan would do the trick.
– Plant tray or container for holding started containers. Again, a 1020 webbed plant tray, or “Daisy Tray,” is ideal, but if you have some recycled low tray with edges that you are willing to dedicate to plants and dirt, that’s just fine, too.
Step by Step Seed Starting for Small Spaces:
The method I prefer, which was taught to me by the greenhouse manager and head of a local garden store, is what follows here.
This method of seed starting has us starting many seeds in one small vessel rather than in individual pots or cells. (There are a few exceptions to this rule that we will discuss in a later question and answer post). We do this to germinate a lot of seeds in a small space in short time. It does require a second step later on, called “potting up.”
The result is healthy, vigorous plants ready for transplanting out to your beds, patio pots, or garden with very limited loss. This method also lets you start a whole garden’s worth of seeds in just an hour or two and in just about two square feet of space, which could prove very important right now if you are a bit behind getting your seeds started for your new garden.
Each type of seed will be started in one 4 x 4-inch pot. We then water and place them in a good place for germination until ready for the next step.
Step 1. Moisten the seed-starting medium.
Lightly moisten the seed starting mix and mix it through a bit so that the soil is evenly moist.
The seedling soil should not be dripping wet or so wet that it clumps. It should be workable and able to be sprinkled with your fingers. You will water the potted seeds again at the end, but this will work to sort of “prime” the mix so that it can wick up adequate moisture at the end.
Step 2. Fill starter post with seedling soil.
Fill one roughly 4 x 4-inch pot or cell pack with seed starting mix. Fill to about 2/3 full.
Step 3. Make rows or a base for the seeds.
If you are using a pot that is not divided, make small “rows” in the soil using a pencil, popsicle stick, or your finger.
If you are using divided cell packs, fill them no more than 2/3 full and do not make rows.
For most seeds, you are aiming for a row or seed depth between ¼ and ½ inch. Your seed packet will tell you the depth to plant the seed if you are unsure (look for “Planting Depth” listed on the package. If none is listed, plant at a depth of ½ inch).
If in doubt, it is better to plant at a shallower depth rather than one that is too deep and ¼ to ½ inch will work well for most seeds. The reason that this is less important is because you will only be sprouting the seeds in these bulk pots. They will be transplanted “up” later.
Step 4. Plant the seeds.
Sprinkle the seeds along the length of the short rows (in non-divided bulk pots) or evenly over the surface of the soil area in the cell packs.
You do not need to worry about proper seed spacing like you would if you were planting out in a bed, permanent pot, or garden. Try not to overcrowd the seeds; leave a little space between. Also aim for a single seed layer and try not to plant so heavily that you end up with seed on top of seed. Again, the seedlings will be transplanted at a later date, so “proper” seed spacing is not necessary.
Step 5. Cover the seeds.
Lightly cover the seeds with soil to a depth of ¼ to ½ inch by sprinkling more seed-starting soil on top. Gently pat the soil down with your fingers. Be sure to label your pot!
Step 6. Water the seed pots.
Water the pot from the bottom up. To do this, fill a solid plant tray or large, flat, approximately 2-inch deep plastic container with lukewarm water. Place the seed pot into the tray of water.
The soil will draw water from the bottom. Leave the pot in the water just until the top of the soil has completely and evenly darkened, indicating it is evenly and adequately moist.
Remove the pot when the soil is evenly dark. Avoid overwatering.
Step 7. Place labeled pots in a germination tray.
Once planted and watered, place the pot in a tray for germinating. All of your different pots and varieties can go together into this tray (or trays if you need a couple).
You can fit approximately 8, 4 x 4 pots or cell packs in one standard plant flat or tray. That’s 8 different seed varieties in just one standard plant tray!
The basket-like webbed “daisy” trays are ideal, because when it comes time to water your pots later on you can place the entire tray into a solid 10 x 20 black germination tray and quickly and easily bottom-water the pots all at once. (That said, use whatever you have on hand if you need or want to!)
Step 8. Place in a moderately warm, dark space to germinate.
If you think along the lines of mimicking Mother Nature, climate control will come easily to you. Just think about the conditions that your seeds would naturally and ideally prefer if they were to grow outside in their natural habitat. A temperature range of 65-75 is a comfortable level for almost all seeds and at this steady temperature your seed should germinate quickly. This is normal room temperature in most homes, so a comfortable, draft-free corner of your home is a good place for your seeds to be while they work to germinate.
Another natural condition for germinating seeds is darkness…think about a cozy seed tucked into a nice, dark, soil. One way to mimic these conditions is to choose or create a dark space in which to place your germinating seeds. At this point, light is not your goal.
Step 9. Maintain moist soil.
The best thing for you to do for your germinating seeds now, once placed in a warm, dark space, is to leave them alone. Almost.
Your seeds and their soil do need to stay moist, but not wet. It is usually best in the home setting to cover the tray full of seed pots with a covering that will help retain moisture. If it also helps block light, that is even better. A length of plastic wrap, aluminum foil, a large box, or a second solid plant tray placed upside-down over the tray all work well.
Peek in on the seeds once every day or two just to make sure the soil has not dried out. If it is getting too dry, place it in a tray of water again, just until the soil darkens. Do not overwater so that you do not rot the seed. You might also choose to lightly mist or spray the pot with a household spray bottle (a new one that has not held cleaning agents or chemicals!).
Step 10. Patiently wait to pot up!
This is all you are going to do with your seeds for about a week or two. The fastest-germinating seeds, often things like broccoli, cauliflower, cabbages, and similar plants, will pop up first and under good conditions this is usually within 7-10 days. Other seeds, tomatoes, peppers, and eggplant, for example, take longer. You seed packet will estimate germination time so you have an idea of what to expect, but do know there is always a range.
Plan to “Pot Up”
In about two weeks you will have seeds that have germinated and grown early roots. You will need to “pot up” these young seedlings into individual growing vessels until they are ready to be planted outside in their permanent garden (or patio container garden) home.
This interim time is the time when you should plan and purchase any supplies and materials that you do not already have for the next stage of small-space garden plant growing. This will probably include a grow light setup that can be tucked in a small space of your home and provide the light your new seedlings will need as they get growing.
You have a window of about two to three weeks before you need to move on to the next phase, so if you start preparing when your seeds are just tucked away for germinating, you should have plenty of time to order or gather the supplies you need.
Subscribe or check back here for the next post in this series, which will give you important tips, tricks, and information to move on through seed-starting success!
Not surprisingly, during this time of stocking up (and let’s
be honest, flat-out panic buying), many of the items we take for granted are just
not available on store shelves. Chief among them, bread…and bread is an
important staple for many, most especially when the kids are all home and
looking for lunches!
If you can bake your own bread, though, that dearth is less of an issue for you. And this looks like a good time to revive or to learn a new old trick or two, to better situate yourself to deal with not only this crisis, but future impacts that might come along.
Baking and Bread Recipes Designed for Modern Life & Times
The goal of my site and my published works has always been to bring self-sustaining knowledge, tips, tricks, and skills, back to the masses; to modify recipes that make it possible for people to make more of their own, cleaner, better, tastier foods from scratch.
I acknowledge that this isn’t always easy when we are in the throes of our “normal” busy day to day lives. So, I’ve always tried to develop helpful posts and books with that in mind, and find the recipes and methods that fit a little more easily into daily life. I’ve had excellent feedback from a number of readers and users saying that they have found these resources to be exactly that—helpful, easier, less-intimidating, and more manageable for today’s busy home cooks.
Judging from the scarcity of flour and basic baking supplies in the stores, people are doing exactly that—becoming a little more self-sufficient, depending more on themselves, and getting lined up to at least be able to bake their own bread and foods for a bit. It’s an excellent skill for the everyday, but one thing we are also learning is that learning and honing a few of these skills now during our time of need is proving an excellent, in fact at times imperative, skill to have in your repertoire. Knowledge can never be lost, and is always worth having, now and in the future—these crazy days prove you never know when you might need to be a little more prepared toward self-sufficiency.
Bake-Your-Own Resources for Beginners to Experienced Bread Bakers
Following is a compiled list of my books and other resources
that can help you fill the needs of your pantry while the shelves are bare (and
maybe for a long time after!):
*All books are available through Amazon in both Paperback and for instant download via Kindle/Kindle Reader Apps.
It does bring in many of the same or similar recipes as the above series and utilizes instant/rapid rise yeast for many of them, again, to streamline and speed the process of baking bread at home.
However, you will also find recipes for NO-KNEAD BREADS that use only a small, small amount of regular active dry yeast
—so if your yeast supply is getting low, take a look at these recipes! No-Knead bread recipes are also excellent time savers, as the “hands-on” time is virtually nil (and the science of it is kind of fun, too). You’ll find bagels, rolls, and sweet treats, too.
Make-Ahead Mix Day: Complete Recipes and Instructions for On-Hand Homemade Quick Mixes: This book is a collection of mason-jar baking mixes that you can prepare ahead and use as needed. They keep very well stashed on a pantry shelf and provide a quick, cleaner, preservative-free version of the grocery store baking mixes that make life easier.
The measuring and proportioning involved in making these mixes is a great project to do with kids—and one that extends learning in a practical way, too!
Even if you don’t want to take the time to make a lot of mixes ahead, the batches themselves make good, easy baking recipes with normal, minimal ingredients.
Sourdough Starter Recipe (Levain): Yeast is one of those somewhat scarce ingredients on the grocery stores lately—probably because they don’t stock as much as they used to, anyway, so it can sell out quick with just a few shoppers. Sourdough bread doesn’t need yeast, though. And you don’t need yeast to make a sourdough starter! This is a traditional, healthy bread (actually better tolerated by a lot of people because of the breakdown of the process), often used by frugal mothers and grandmothers and by rural-dwellers who didn’t rely on frequent trips to the corner store—they simply kept a starter culture going in the kitchen instead.
And yes, you will find some easy sourdough bread recipes in the Quick-Time Homemade Bread book above! (*Note: Though you do not need yeast to make a sourdough starter or to make sourdough bread, if you have a pinch to spare you can throw it in to make the process go a little faster.)
Beer Bread Recipe (plus make-your-own self-rising flour link): Beer bread is technically a quick-bread, but easier and unlike any other you’ve ever eaten.
It’s a quick bread a bit more like regular sandwich bread that is great to have with butter, as a dinner side, or with cheese, and it works well for sandwiches, too.
This recipe could be a real life-saver for those of you who are out of bread and out of time!
Math, Science, Life Skills, Learning…Baking Has a Lot of Educational & Life Value to Offer!
Let’s not forget—baking is actually a very valuable learning exercise that includes a lot of hands-on math and science, reading, and more. For many of you battling the boredom and looking for meaningful, useful ways to muddle through these awkward pseudo-homeschooling times, wrapping in some bread-making and baking activities is truly double-duty!
I hope you find these resources very useful. All are available via Amazon in paperback and for immediate download for Kindle and Kindle e-reader apps; just follow the above links.
Stay safe, take heart, and BE WELL!!
*This post contains affiliate links to helpful books and products, at no additional cost to the reader/purchaser. This will take you to secure login and purchasing via your personal Amazon account. NO personal information is shared with this website from Amazon. Links such as these help to support and maintain this website. Thank you for clicking through to purchase these products!
Self-rising flour is useful in many recipes. It’s not something that everyone always has one hand, though.
It IS something that comes in very handy when you want to make something like Beer Bread or one of countless other recipes that call for self-rising flour. And if the recipe asks for it, you can’t just directly substitute self-rising flour for all-purpose flour, because there is a difference. (Namely, that self-rising flour already has rising agents like baking powder built in.)
So when you need it, you need it.
The good news is that self-rising flour can very easily be mixed up in minutes from regular, everyday ingredients any baker at any level is sure to have on hand.
Here is a quick and easy “substitute” for self-rising flour.
Substituting Self-Rising Flour: Make Your Own at Home
Very quickly, here is how to make self-rising flour if you don’t have any. Use it for quick breads, for biscuits, dumplings, muffins, or any recipe that calls for self-rising flour!
Self-rising Flour:
Simply sift the following ingredients together:
2 Cups white all-purpose flour
1 Tablespoon baking powder
1 Teaspoon salt
Double, triple, or more to make as much homemade self-rising flour as you want to have on hand. Store extra in an air-tight container and keep away from moisture.
Keeps as long as a normal flour or self-rising flour should!
No-Knead Bread is the Easy Solution for Preservative-Free Homemade Bread
I’m actually not sure why no-knead bread is just now
becoming trendy in clean home-baking. It is the absolute simplest bread to make.
It requires the most minimal of ingredients. It takes almost NONE of your precious,
limited time. No-knead bread is clean and preservative-free, and a myriad of
recipes means that you can easily choose one to fit your health, diet, or
culinary goals.
Really. There’s just no downside to no-knead bread.
For busy people today (and who isn’t!?), no-knead bread is THE solution to problem of being able to put home-made, quality, reliable, knowable goodness on the table, with a side of holy delicious and nostalgia!
No-Knead Bread: The Time It Takes
So, what is it that maybe scares people from making cleaner,
better no-knead breads at home?
If one had to guess, you could suppose it’s that it takes a
long time to make no-knead bread. Hours, in fact. OVERNIGHT, in fact. Or
rather, at least 6 to 8 to 12 and maybe even 18 hours!
Who in the world has that time today!?
We all do. Because here’s the thing. The “time” it “takes”
to bake no-knead bread is not hands-on time at all. It’s almost completely in rising—a
slow, sourdough-like rise time (without the hassle of maintaining a sourdough
starter) with a moist, soft sponge, that pretty much doesn’t even get your
hands dirty. You’re literally only talking maybe—MAYBE—5 minutes of
measuring and mixing (if you drag it out), and then covering the bowl,
forgetting about until the next morning, or the next afternoon, or whenever you
have the time, then a quick dump-and-shape-up with a little more rising while
the oven heats up, and around 45 minutes of baking.
All told, you’re looking at a maximum of 15 minutes of
hands-on “labor.” The rest of the time, you could be soaking in the bath, working,
running your kids around endlessly, or reading a book for all the bread cares. You
see where I’m going with this. No-knead bread doesn’t need us, either.
So,
How Long Does It Take to Bake No-Knead Bread?
Here’s a general overview of how long it takes to make no-knead
bread (for the typical no-knead bread recipe; the process itself doesn’t vary
that much between recipes for no-knead bread):
Dough preparation: 5 minutes (measuring, mixing)
Rising/proofing time: minimum 6 hours, 8-12 recommended, can go as long as 18-24 as life dictates
Baking prep (turning out dough, shaping loaf): 5 minutes (maybe?)
Final rising (mostly while oven and Dutch oven or baking vessel preheats): 45 minutes
Baking time: 45 minutes
Total Time: average 9 hours, 45 minutes
Total ACTIVE (read: busy, hands-on) time: 10-15 minutes
A Bare Minimum of Ingredients
The time-factor is one of the biggest reasons to bake
no-knead bread.
The others? TASTE and homemade goodness, clean
PRESERVATIVE-FREE bread, INGREDIENT CONTROL, and ease-of-use (you really don’t
need to be a bread baker, or much of a cook at all, to make this bread; basic
kitchen skills required—an excellent bread for beginners!).
So,
What Ingredients are in No-Knead Bread?
You’ll probably be floored when you see the list of
ingredients for the typical no-knead bread. They include:
Flour
Water
Salt
Yeast (about ¼ teaspoon)
Seriously. That is all.
Now sure, there are no-knead bread recipes with more ingredients. If you’re looking for a more savory or flavored no-knead bread, that’s an option, too. You might find one like a Cherry, Nut, & Chocolate no-knead bread recipe; perhaps a Wheat no-knead bread recipe; you could make a multi-grain no-knead bread; or a Garlic and Herb no-knead bread recipe might be your choice. But even with no-knead breads as delicious- and complicated-sounding as these, the process, and therefore the time involved, remains largely unchanged. You’re talking about a little more preparation and a little more measuring. A few measly more minutes. The results, however, are anything but measly. They’re amazing, quite frankly.
Now that you’re a little more comfortable with taking on
these easy, clean, delicious (so delicious), crusty, chewy,
European-style no-knead breads, all that’s left is to find some good recipes to
get started.
So buy the book (you can get it for Kindle or in paperback), bake the bread, and be sure to come back here and share your experience (and your no-knead bread pictures, too!).
Happy Baking & Enjoy!
*This post contains affiliate links to helpful books and products, at no additional cost to the reader/purchaser. This will take you to secure login and purchasing via your personal Amazon account. NO personal information is shared with this website from Amazon. Links such as these help to support and maintain this website. Thank you for clicking through to purchase these products!