Bisquick Recipes: Beer Batter Chicken Nuggets

One of my family’s favorite Bisquick recipes that I make with my homemade all-purpose baking mix is this one for Beer Batter Chicken Nuggets. I made it as a weekend treat one Saturday and it’s become a fast favorite. I was actually surprised by that because my husband is no fan of fried foods, but this one he loves. So it’s got to be good, right?

Beer Batter Chicken Nuggets Bisquick RecipeAThis recipe can be pretty quick to prepare (although the deep frying takes some time, I won’t lie). The batter itself is extremely easy to make with the homemade bisquick mix recipe here on this site (see link above). If you buy boneless chicken breasts and cut them to size it’ll be fairly short work. Here on the homestead, though, we try to use as much of our own home-grown meat as possible. We process and freeze between 60 and 80 meat birds every year so when I make these I bone out and chunk up the meat from some of my own. When I do this I use the whole bird – light and dark meat all goes into the mix and comes out delicious.

You, of course, should use whatever you prefer. Even if you do not have your own home-grown chicken on hand, buying a roaster and boning/cutting off the meat will still save you a lot of money and will give you a big batch for much less. Don’t worry about making too much, either. I’ve never had leftovers go past the next day, they reheat easily and deliciously in the oven, and once cooked they would be great to freeze and reheat later, too…a great make-ahead convenience treat!

So now, on to the recipe!

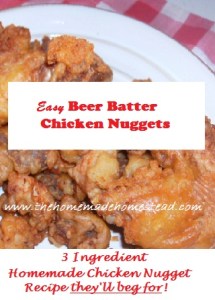
Homemade Beer Batter Chicken Nuggets

Bisquick Recipes: Beer Batter Chicken Nuggets
Author: 
Recipe type: Bisquick Recipe, Poultry
Cuisine: Comfort and Convenience Foods
Prep time: 
Cook time: 
Total time: 
Serves: 4
 
A sure family favorite that will leave you shunning freezer-aisle chicken nuggets.
Ingredients
  • 2 to 3 pounds Chicken, cut into approx 1½ inch cubes (or approximate shapes)
  • 1 Cup Homemade All Purpose Baking Mix or Bisquick
  • 1 Egg
  • ½ Cup Beer
  • ¼ to ½ tsp Garlic Powder (to taste)
  • Salt and Pepper to Taste
Instructions
  1. Beat egg slightly, then add beer.
  2. Add egg and beer mixture to measured baking mix.
  3. Stir to combine, until most of the lumps are gone.
  4. Cut chicken to desired size and add to wet batter mixture as you go.
  5. Let chicken chunks stay in the batter until you are ready to fry.
  6. Heat shortening, lard, or cooking oil in a deep frying pan or dutch oven.
  7. When oil is ready, add chicken chunks and fry until golden brown, turning when the first side is browned (about 3 minutes in 365 degree fat).


Bisquick Beer Batter Chicken NuggetsI generally do a lot of nuggets when I do make these, and I usually triple or even quadruple the batch. If you are planning to bone a roaster, plan for one recipe of batter for each whole bird you bone out (so if I bone 3 of my birds, I triple the batter batch). If the chickens you bone are large, you may need a triple batch of batter for every 2 birds. (No worries, though, it’s simple to mix up a bit more batter if you think you need more–takes just a minute!).

These chicken nuggets are also an excellent base for sauces either for dipping (we like honey mustard barbecue sauce) or to coat with for things like Buffalo Chicken Nuggets or Chinese foods like Sweet and Sour Chicken or General’s Chicken (just add sauce & accompaniments & toss).

As always, I hope you do enjoy!


Like this post? Then be sure to SUBSCRIBE so you don’t miss out on more tips and recipes!


Bisquick Recipes: 20 Minute Cinnamon Rolls

Cinnamon rolls–I don’t believe I know one person who doesn’t love them, but they are probably one of the more seldom made homemade baked goods. I get it. Making cinnamon rolls is a bit of a commitment, and quite often we just don’t have the time (we are NOT counting the pop-the-can variety, here 😉 ).

Yeast cinnamon rolls, while one of my absolute favorites in the world, just don’t always fit into our schedules. But THESE cinnamon rolls certainly will and they’re a very fair substitute. We’re talking BASIC ingredients (remember that all purpose baking mix?), a few minutes to mix and roll, and 12 minutes to bake. You’ll be quite happy with the results, I promise.

Baking Mix Cinnamon Rolls

https://thehomemadehomestead.com/?p=50In case you didn’t take my hint, you’re going to want to go grab that homemade Bisquick we talked about a few days back. If you don’t have it, don’t worry. You probably even have all the ingredients and time to make the homemade Bisquick recipe, too! However, this recipe also works with any all-purpose baking mix or Bisquick, Jiffy mix, biscuit mix, etc. I did use the mix linked above, though.

These easy cinnamon rolls are very simple to make with minimal time and ingredients. Here’s how:

20 Minute Cinnamon Rolls

Ingredients:

  • 4 Cups Baking Mix (All purpose like homemade Bisquick mix)
  • 2 Eggs
  • 1 1/4 Cups Milk
  • Soft (spreadable) butter
  • Cinnamon Sugar

-Combine the baking mix, eggs, and milk and mix through.

-Dust cutting board with a bit of additional baking mix or flour and knead 6-8 times (I actually do this on a cookie sheet I keep for such things–contain the mess, save time!).

-Press (or roll) dough out to about 8 x 15, or 1/4 to 1/2 inch thickness.

-Spread dough with softened butter and then sprinkle with cinnamon sugar (I like a heavy cinnamon flavor, so I often dust the sugar with more plain cinnamon).

-Roll the dough, starting with the longest edge (when finished you should have one long “tube” of cinnamon roll, about 15 inches long).

-Cut into 1-inch slices and place on lightly greased cookie sheet (or parchment paper-lined cookie sheet).

– Bake at 425 F for about 12 minutes.

-Makes about 15 cinnamon rolls.

While baking, mix a quick glaze for the top.

For the glaze:

  • 1 Cup Confectioner’s Sugar
  • 1 splash Vanilla Extract (1/2 teaspoon? To taste)
  • 2 Tablespoons Milk

Simply mix ingredients together to a pourable consistency, adding more or less milk as needed. Drizzle over hot rolls when they come out of the oven.

Enjoy!

That’s it. That’s all there is to it. Whip them up in the morning while the sleepy-heads are in bed and they’ll think you slaved for them all the wee hours. And don’t forget to come back again because I’ll have more versatile, delicious homemade Bisquick recipes for you–including a delicious Homemade Beer Batter Chicken Nugget recipe coming soon!

(Bisquick® is a registered trademark of the General Mills company.)

How to Make An Economical, Versatile Homemade All Purpose Baking Mix

Call it Bisquick®, Jiffy® mix, biscuit mix, baking mix, or what have you, it all amounts to the same thing. The one thing all of these have in common is that they all represent a very basic pantry staple designed to speed dinners and baking and make our lives easier. In this harried day and age, we’re all for that, right!?

What we’re NOT all for is overpaying for our baking needs. Baking from scratch is, for https://thehomemadehomestead.com/?p=37sure, the cheapest and most wholesome way to go, and the easiest way to control what goes into your food. Unfortunately it’s not always the fastest or most convenient. And unfortunately we pay a lot for anything that is deemed convenient in the grocery stores. It makes it tough to balance a family budget.

So what if I told you you could make your own homemade Bisquick; you’re own all purpose baking mix that can be used for a range of recipes, meals and treats for a fraction of the cost and with an investment of only a few minutes of your time?

Honestly, once you learn how to make Bisquick on your own, you’re not likely to go back to overpaying for undersized boxes of the stuff in the store. I promise it’s not at all hard and it will not take you long. A big batch with this faked Bisquick recipe only takes about 20 minutes to make (and I’m being generous here–in 20 minutes you’ll have it mixed and packaged and be on to a nice batch of warm biscuits, ready for the honey and butter).

How To Make Bisquick ®

It’s not hard to find a baking mix recipe online or even in some cook books. I’ve been through a few goods ones but this is one I have tried, prefer, and know that it meets all my requirements for an all purpose baking mix:

  • It is affordable and cheaper than buying boxed mixes
  • It is simple to make
  • It requires few ingredients
  • It stores well
  • It is versatile and can be used to make many things (in future posts we’ll see just how versatile it can be–so do follow along and come back often!)

So without further ado here is my preferred recipe; print and use it well and often:

Homemade Baking Mix Recipe


5.0 from 1 reviews
How to Make An Economical, Versatile Homemade All Purpose Baking Mix
Author: 
Recipe type: Make-Ahead Baking Mix
Prep time: 
Total time: 
Serves: 2 gallons of mix
 
Homemade Bisquick or all-purpose baking mix recipe that can be used to replace Bisquick (R), Jiffy Mix (R), pancake mix, or any other basic baking mix. Use for a variety of recipes and dishes (anywhere you would use Bisquick or anything similar!).
Ingredients
  • 20 Cups All-Purpose Flour (equivalent to a 5 pound bag)
  • 2 Tablespoons Salt
  • 7 Tablespoons Sugar
  • ⅔ Cup Baking Powder
  • 2 Cups Lard or Shortening
Instructions
  1. Combine and mix through all dry ingredients in a LARGE bowl (even a roasting pan works well, or large Tupperware--just leave yourself room to work).
  2. Add lard (or shortening) to the mix.
  3. Cut lard into the mix until thoroughly combined and you have only about pea-sized pieces of shortening throughout.
  4. (This is not nearly as bad as it sounds like it would be to do; using a pastry cutter or mixing with clean hands works well; you could also do 2-3 cups of dry mix and about ½ cup of lard at a time in a food processor, pulsing to combine, then mix the final batch all together and stirring well to distribute).
  5. Store in air-tight container and use as you would a brand-name baking mix.


(*I use lard because it is stable at room temperature and I believe in using the most natural products I can, including animal fats. However, I’ve recently learned that only store-bought lard is shelf stable [because it is hydrogenated :(]. The “real thing”–lard rendered without manipulation or additives, mostly only available now if you render your own lard at home–is not shelf-stable. You can still use it and I will do so as soon as I’ve made a batch of my own homemade rendered lard [coming soon!]; but I will keep the mix in the refrigerator and freeze any extra. Vegetable shortening could also be used and will make the mix shelf-stable at room temperature. Just remember that if you use a fat/shortening that normally requires refrigeration [like butter], your mix will need refrigeration as well.)

And that, folks, is all there is to it. Once done simply store in a sealed container (I usually use half-gallon mason jars [Half Gallon Wide Mouth Canning Jar (Set of 6)]
or a large Tupperware cereal container [Rubbermaid Home 1777195 Cereal Keeper]). Store as usual and use at the same measurement for any recipe that calls for Bisquick, all purpose baking mix, biscuit mix, etc. And do keep coming back as I’ll be sharing some great recipes for this mix in the future!

(Bisquick® is, of course, a name-brand and is a registered trademark of the General Mills company.)